Best Smart Refrigerators 2024: Features and Reviews

Best Smart Refrigerators 2024: Features and Reviews

Table of Contents

The best smart refrigerators of 2024 offer great features that can help you save time and energy.

Check out our best refrigerators of 2024 for more great options.

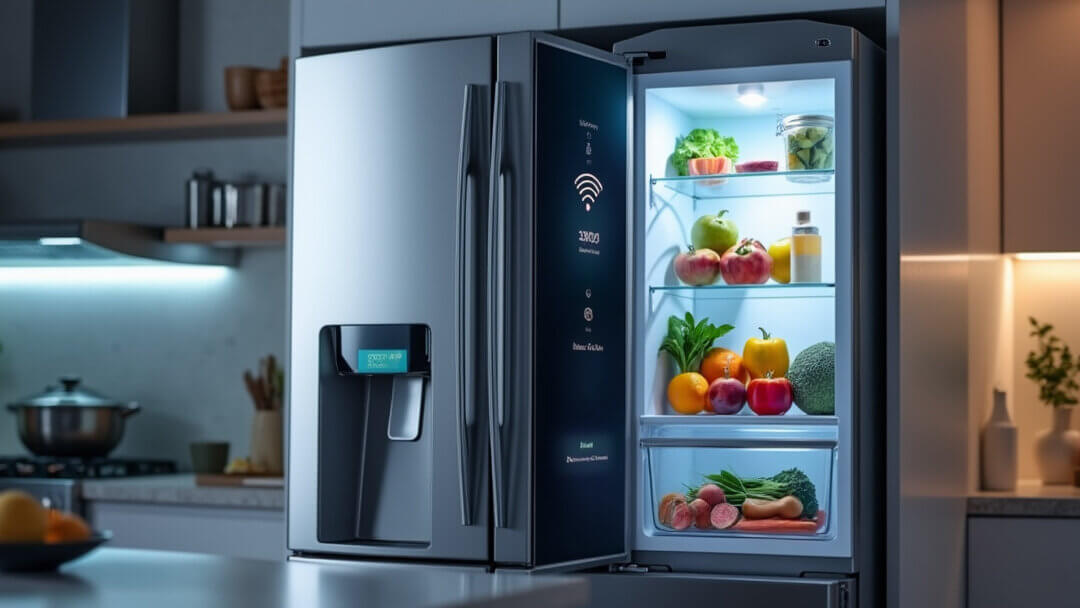
Smart refrigerators are designed to make your kitchen more efficient and connected. The best smart refrigerators of 2024 can help make your life easier with features like Wi-Fi, voice control, touchscreens, and even artificial intelligence.

Here are some reasons why you might want a smart refrigerator:

  • Convenience: You can control your fridge from your phone.
  • Energy Efficiency: Smart fridges can help you save energy.
  • Food Management: Built-in cameras let you see what’s inside, even when you’re at the store.
  • Smart Features: Voice assistants, smart displays, and recipes make cooking fun.

Top Smart Refrigerators of 2024

1. Samsung Family Hub 4.0

If you need help with fridge repair in Ottawa, we are here for you.

best smart refrigerators of 2024, and it is also one of the It has a big touchscreen and works with Bixby, Google Assistant, and Alexa.

Key Features:

  • Touchscreen Control: Shows calendars, recipes, and can even stream content.
  • Interior Cameras: See what’s inside your fridge remotely.
  • Energy Efficiency: Monitors energy usage to help you save money.

Why It Stands Out: The Family Hub is great for keeping everyone in the family connected. It also works well with other smart devices.

2. LG InstaView Door-in-Door Refrigerator

It is also one of the best smart refrigerators of 2024.

Key Features:

  • InstaView Technology: Knock twice to see inside.
  • Voice Control: Works with Alexa and Google Assistant.
  • Smart Cooling System: Keeps temperatures steady for better food storage.

Why It Stands Out: The InstaView helps save energy and is easy to use, making it great for energy efficiency.

3. GE Profile Smart 4-Door French Door Refrigerator

Need to know how to set up your new fridge? Read our comprehensive guide on how to install a refrigerator.

The GE Profile Smart Refrigerator has a drawer that can change temperatures, which makes it very flexible.

Key Features:

  • Customizable Drawer: Adjust the temperature for different foods.
  • Hands-Free Water Dispenser: Use voice commands to get water.
  • Energy-Efficient Operation: Energy-saving mode to reduce electricity use.

Why It Stands Out: The adjustable drawer and voice control make it very convenient.

4. Bosch 800 Series Smart Refrigerator

It is also considered one of the best smart refrigerators of 2024.

Key Features:

  • Home Connect App: Control the fridge from your phone.
  • FreshProtect Drawer: Keeps fruits and vegetables fresh longer.
  • Sleek Design: Simple and stylish for modern kitchens.

Why It Stands Out: The Bosch 800 Series is focused on saving energy and keeping food fresh.

Smart Fridge Features Comparison

FeatureSamsung Family HubLG InstaViewGE Profile Smart 4-DoorBosch 800 Series
Touchscreen DisplayYesNoNoNo
Voice AssistantBixby, Alexa, GoogleAlexa, GoogleAlexaHome Connect
Interior CamerasYesNoNoNo
Energy EfficiencyHighModerateHighVery High
Special FeatureFamily CalendarKnock to ViewCustomizable DrawerFreshProtect Drawer

Factors to Consider When Buying a Smart Refrigerator

Interested in other kitchen appliances? Check out our top 10 dishwashers of 2024.

1. Energy Efficiency

Energy-efficient fridges save money and help the environment. Look for models like the Bosch 800 Series and Samsung Family Hub for good energy savings.

2. Connectivity and Compatibility

If you already have a smart home setup, make sure your fridge will work well with it. Samsung Family Hub works great with other Samsung devices, while LG and GE work with many platforms.

3. Food Management Features

Learn how to keep your fridge in top shape with our guide on basic refrigerator maintenance.

Features like smart cooling, built-in cameras, and temperature control drawers can help keep your food fresh and make cooking easier. Samsung Family Hub and LG InstaView are good choices for these features.

4. Size and Capacity

Make sure the fridge is the right size for your kitchen and has enough space for your family’s needs. French door models like GE Profile 4-Door offer lots of room.

5. Price

Smart refrigerators can be expensive. It’s important to choose a model that has the features you want without going over your budget.

Pros and Cons of Smart Refrigerators

Pros

  • Convenience: Control your fridge from your phone, use voice commands, and more.
  • Energy Savings: Many smart fridges help save energy.
  • Food Management: See what’s in your fridge anytime and plan meals better.
  • Smart Integration: Works with other smart home devices.

Cons

  • Price: They can be more expensive than regular fridges.
  • Complexity: Learning to use all the smart features may take time.
  • Maintenance: More features mean more parts that might need fixing.

Conclusion: Which Smart Refrigerator is Best for You?

The best smart fridge depends on what you need. The Samsung Family Hub has lots of features and works great for a full smart home. The Bosch 800 Series is the best for saving energy. LG InstaView is perfect if you want to save energy and see inside easily, and GE Profile 4-Door is good if you need more space and flexibility.

Think about what’s important to you, like energy savings, smart features, and size, to find the perfect fridge for your home.

FAQs

Q: Are smart refrigerators energy-efficient?
A: Yes, many smart refrigerators, like the Bosch 800 Series, help save energy.

Q: Can I control a smart refrigerator with my phone?
A: Yes! Most smart fridges, including Samsung Family Hub and LG InstaView, have apps to control them remotely.

Q: Do smart refrigerators need a lot of maintenance?
A: They may need more maintenance than regular fridges, especially for tech parts like screens and cameras.

How to Fix a Refrigerator That Won’t Cool: Troubleshooting and Solutions

How to Fix a Refrigerator That Won’t Cool: Troubleshooting and Solutions

Table of Contents

1. Check the Power Supply and Settings

Before diving into complex repairs, the first step is to check if your refrigerator is getting power. Sometimes, the issue might be as simple as a power outage, a tripped circuit breaker, or an unplugged power cord.

Solution: Ensure the refrigerator is plugged in and the power cord is securely connected to the outlet. Check the circuit breaker or fuse box for any tripped breakers or blown fuses. If the refrigerator is receiving power, confirm that the internal temperature settings are correct. The ideal temperature for a refrigerator is between 37°F (3°C) and 40°F (4°C).

2. Inspect the Condenser Coils for Dirt and Dust

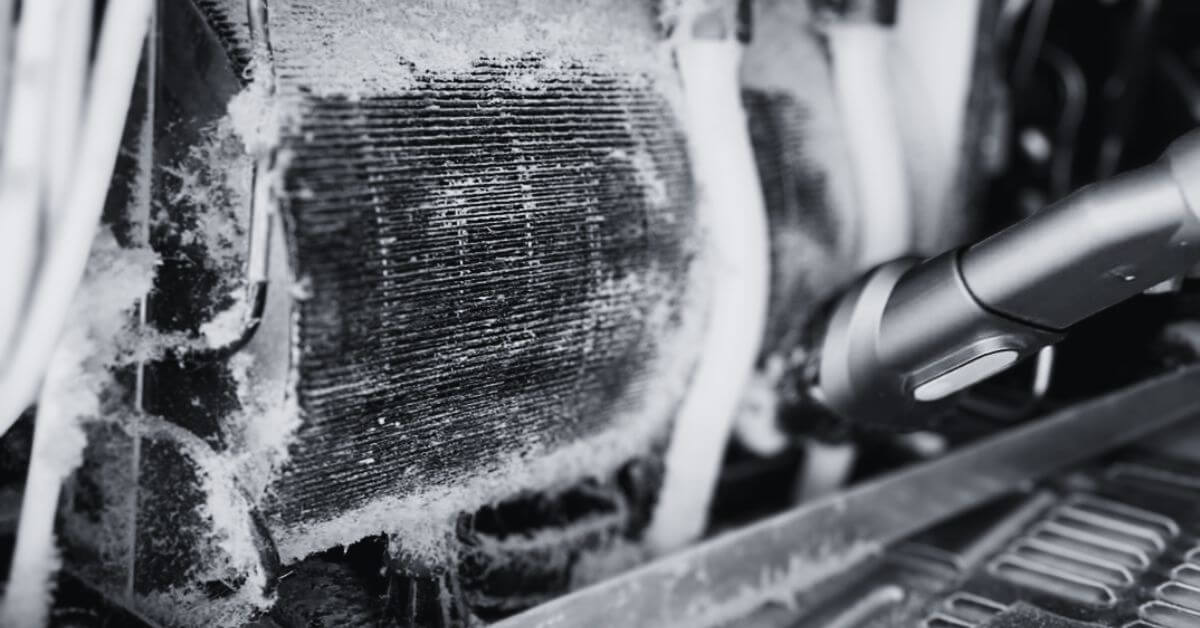
Condenser coils are responsible for dissipating heat from the refrigerator. Over time, these coils can accumulate dust and debris, reducing their efficiency and causing the refrigerator to stop cooling properly.

Solution: Locate the condenser coils, usually found at the back or bottom of the refrigerator. Unplug the refrigerator and use a coil brush or a vacuum cleaner with a brush attachment to gently clean the coils. Remove any dust, dirt, or pet hair. Cleaning the coils can improve airflow and cooling efficiency.

3. Examine the Evaporator Fan

The evaporator fan circulates cool air throughout the refrigerator and freezer compartments. If the fan is not working correctly, it can lead to uneven cooling or a complete lack of cooling.

Solution: Open the freezer compartment and listen for the sound of the evaporator fan running. If you don’t hear it, the fan may be faulty or blocked. Unplug the refrigerator and remove the freezer’s back panel to access the fan. Check for any obstructions or signs of damage. If the fan blades are broken or the motor is defective, replace the fan.

4. Check the Thermostat Settings

A faulty thermostat can prevent the refrigerator from reaching the desired temperature, causing it to stop cooling effectively.

Solution: Locate the thermostat inside the refrigerator. It’s usually a dial or digital control. Turn the thermostat to the lowest setting and listen for a clicking sound, indicating it’s working.

If there’s no sound, the thermostat might be defective and need replacement. Consult your refrigerator’s manual for the specific model’s instructions on replacing the thermostat.

5. Assess the Door Gaskets for Leaks

The door gaskets create an airtight seal around the refrigerator door, keeping cold air in and warm air out. Over time, gaskets can become worn, cracked, or loose, leading to air leaks and poor cooling.

Solution: Inspect the gaskets around the refrigerator and freezer doors for cracks, tears, or signs of wear. To test the gasket’s seal, close the door on a piece of paper and try to pull it out. If the paper slides out easily, the gasket isn’t sealing properly.

Clean the gaskets with warm, soapy water and a cloth to remove any dirt or grime that might affect the seal. If damaged, replace the gaskets to restore the airtight seal.

6. Look for Frost Buildup in the Freezer

Excessive frost buildup in the freezer can block air vents, restrict airflow, and reduce cooling efficiency in both the freezer and refrigerator compartments.

Solution: Check the freezer for excessive frost or ice buildup. If frost is present, unplug the refrigerator and allow it to defrost. Once defrosted, clean the freezer with a cloth. To prevent frost buildup in the future, ensure that the freezer door is closing properly and not left open for extended periods.

7. Investigate the Compressor for Issues

The compressor is the heart of the refrigerator’s cooling system. If the compressor is not running or making strange noises, it could indicate a problem that needs attention.

Solution: Listen for the sound of the compressor running. If it’s silent or making unusual noises, it might be faulty. Check the relay and capacitor attached to the compressor for any signs of damage. If the compressor is not functioning correctly, it may need to be replaced by a professional technician.

8. Test the Start Relay

The start relay helps the compressor start and run efficiently. A faulty start relay can prevent the compressor from running, leading to cooling problems.

Solution: Unplug the refrigerator and locate the start relay, usually found on the side of the compressor. Remove the relay and shake it gently. If you hear a rattling sound, it’s likely defective and needs replacement. Install a new start relay to see if it resolves the cooling issue.

9. Ensure the Vents Are Clear

Refrigerators have vents that allow cold air to circulate between the freezer and refrigerator compartments. Blocked vents can disrupt airflow, causing uneven cooling or no cooling at all.

Solution: Check the vents inside the refrigerator and freezer compartments for any obstructions, such as food containers or ice buildup. Ensure that nothing is blocking these vents and that air can flow freely. Rearrange items in the refrigerator to allow better airflow.

10. Check the Defrost System

A malfunctioning defrost system can cause ice to build up on the evaporator coils, restricting airflow and reducing cooling efficiency.

Solution: The defrost system consists of the defrost timer, heater, and thermostat. If any of these components fail, ice buildup can occur. Unplug the refrigerator and manually advance the defrost timer to see if it starts the defrost cycle.

If not, the defrost timer may need replacement. Similarly, check the defrost heater and thermostat for continuity with a multimeter. Replace any defective parts to restore proper defrost function.

11. Examine the Temperature Control Board

The temperature control board regulates the cooling system’s operation. A malfunctioning board can prevent the refrigerator from cooling effectively.

Solution: If other components seem to be working correctly, but the refrigerator still isn’t cooling, the temperature control board could be at fault. Inspect the board for any visible signs of damage, such as burnt areas or broken connectors. If you suspect the board is defective, consult a professional technician to diagnose and replace it.

12. Test the Door Switch

The door switch turns on the light inside the refrigerator when the door is opened and signals the cooling system to pause. A faulty switch can cause the cooling system to malfunction.

Solution: Open the refrigerator door and press the door switch. If the light doesn’t turn off, the switch may be faulty. Test the switch for continuity with a multimeter. If defective, replace the door switch to restore proper operation.

13. When to Call a Professional

While many refrigerator cooling issues can be fixed with DIY solutions, some problems require professional help. If you’ve tried the above steps and your refrigerator still won’t cool, or if you’re unsure about performing certain repairs, it’s best to call a professional appliance repair technician.

Conclusion

Fixing a refrigerator that won’t cool involves identifying the root cause and applying the appropriate solution. Whether it’s cleaning dirty condenser coils, replacing a faulty thermostat, or unblocking vents, most issues can be resolved with a little time and effort.

Regular maintenance and timely repairs can extend the life of your refrigerator and keep it running efficiently. If you encounter persistent problems, don’t hesitate to seek professional assistance.


How to Perform Basic Maintenance on Your Refrigerator

How to Perform Basic Maintenance on Your Refrigerator

How to Perform Basic Maintenance on Your Refrigerator: A Step-by-Step Guide

Why Refrigerator Maintenance is Important

Regular refrigerator maintenance is crucial for several reasons:

  • Energy Efficiency: A well-maintained refrigerator uses less energy, saving you money on your electricity bills.
  • Extended Lifespan: Keeping your fridge clean and in good working order can extend its life, delaying the need for costly replacements.
  • Food Safety: A clean and properly functioning refrigerator ensures your food stays fresh longer, reducing waste and preventing foodborne illnesses.
  • Prevention of Breakdowns: Routine checks can identify potential issues before they turn into major problems, helping you avoid expensive repairs.

Tools and Supplies Needed

Before you begin, gather the following tools and supplies:

  • Soft cloths or sponges
  • Mild dish soap
  • Baking soda
  • Vacuum with a brush attachment
  • Coil cleaning brush
  • Leveling tool
  • Replacement water filter (if needed)
  • Screwdriver (if needed)

Step-by-Step Refrigerator Maintenance Guide

Step 1: Clean the Interior

  1. Empty the Refrigerator: Remove all food items and place them in a cooler to keep them fresh while you clean.
  2. Remove Shelves and Drawers: Take out all removable parts and wash them in warm, soapy water. Let them dry completely before replacing them.
  3. Wipe Down the Interior: Use a soft cloth and a mixture of mild dish soap and water to wipe down the interior walls and surfaces. For stubborn stains, use a paste made of baking soda and water.
  4. Dry Thoroughly: Ensure all surfaces are dry before putting shelves, drawers, and food back in the fridge.

Step 2: Check and Clean the Gasket

  1. Inspect the Gasket: The rubber seal around the refrigerator door (gasket) ensures a tight seal. Check for cracks, tears, or signs of wear.
  2. Clean the Gasket: Use a cloth dampened with warm soapy water to clean the gasket, removing any dirt or grime.
  3. Check the Seal: Close the door on a dollar bill. If you can easily pull the bill out, the gasket may need to be replaced to ensure a proper seal.

Step 3: Vacuum the Coils

  1. Locate the Coils: The condenser coils are usually located at the back or bottom of the refrigerator.
  2. Unplug the Refrigerator: For safety, unplug the appliance before cleaning the coils.
  3. Vacuum the Coils: Use a vacuum cleaner with a brush attachment to remove dust and debris from the coils. This helps improve the refrigerator’s efficiency.
  4. Use a Coil Brush: For deeper cleaning, use a coil cleaning brush to reach areas the vacuum can’t.

Step 4: Inspect the Condenser Fan

  1. Locate the Fan: The condenser fan is typically found near the coils, usually at the back or bottom of the unit.
  2. Clean the Fan Blades: Use a soft cloth or brush to remove dust and debris from the fan blades.
  3. Check for Obstructions: Ensure there are no obstructions that could prevent the fan from spinning freely.

Step 5: Level the Refrigerator

  1. Check the Level: Use a leveling tool to check if the refrigerator is level. An unlevel fridge can cause doors to not close properly, leading to energy inefficiency.
  2. Adjust the Feet: If needed, adjust the refrigerator’s leveling feet to ensure it is properly balanced.

Step 6: Test the Temperature Settings

  1. Check the Settings: The recommended temperature for a refrigerator is between 37°F (3°C) and 40°F (4°C), and the freezer should be at 0°F (-18°C).
  2. Adjust as Needed: Make sure the internal temperatures match these settings to ensure food safety and energy efficiency.

Step 7: Clean the Drip Pan

  1. Locate the Drip Pan: The drip pan is typically located at the bottom of the refrigerator.
  2. Remove and Clean: Carefully remove the drip pan and clean it with warm, soapy water. Ensure it is dry before replacing it.

Step 8: Change the Water Filter

  1. Locate the Filter: The water filter is usually located in the refrigerator compartment or behind the unit.
  2. Follow Manufacturer Instructions: Refer to your refrigerator’s manual for specific instructions on replacing the water filter.
  3. Replace the Filter: Install the new filter according to the instructions, ensuring it is properly seated.

When to Call a Professional

While these maintenance steps are relatively straightforward, there are times when you should call a professional:

  • Persistent Leaks: If your refrigerator has a persistent leak that cleaning the drip pan and ensuring it is level doesn’t resolve, a professional may be needed.
  • Unusual Noises: Unusual sounds that persist even after cleaning the fan and coils may indicate a mechanical issue.
  • Temperature Fluctuations: If you notice your refrigerator isn’t maintaining a consistent temperature, this could signify a problem with the thermostat or cooling system.
  • Visible Damage or Wear: If you find significant damage to the gasket, coils, or any internal components, professional assessment and repair are advised.

Conclusion

Regular maintenance of your refrigerator is key to keeping it running efficiently and preventing costly repairs. By following these simple steps, you can ensure your appliance remains in top condition, keeping your food fresh and your energy bills low. Remember, when in doubt or if you encounter more complex issues, don’t hesitate to call a professional for help.

By taking proactive steps in maintaining your refrigerator, you’re not just extending its life but also contributing to a more energy-efficient home. Happy maintaining!

By following this guide, you’ll keep your refrigerator in peak condition and avoid the headaches of unexpected breakdowns. Remember, King Appliance Repair Company is always here to assist with any repairs or professional maintenance you may need!

How to Install a Refrigerator: A Comprehensive Guide

How to Install a Refrigerator: A Comprehensive Guide

Table of Contents

Preparation and Planning

Before starting the installation process, it’s essential to prepare adequately. Here’s what you need to do:

  • Measure Your Space: Measure the height, width, and depth of the area where the refrigerator will be placed. Ensure there’s sufficient clearance on all sides to allow for proper ventilation, typically at least an inch on the sides and back. Check the doorways, hallways, and any obstacles along the delivery path to ensure the refrigerator can be safely transported into your kitchen.
  • Choose the Right Location: Your refrigerator should be placed away from heat sources such as ovens or direct sunlight, as excessive heat can reduce its efficiency. Ensure proximity to a power outlet and, if applicable, a water line for models with ice or water dispensers.

Unboxing and Inspecting Your Refrigerator

Once you’ve prepared the space, it’s time to unbox your new refrigerator:

  • Unbox Carefully: Remove all packaging materials, including the protective film, foam inserts, and tape. Check for any signs of damage that may have occurred during delivery. Scratches, dents, or any internal issues should be reported immediately to the retailer.
  • Let the Refrigerator Sit Upright: After moving the fridge to its designated spot, allow it to sit upright for at least 4-6 hours before plugging it in. This waiting period allows the compressor oil to settle, ensuring smooth operation.

Connecting the Water Line (If Applicable)

If your refrigerator comes with an ice maker or water dispenser, connecting the water line is the next step:

  • Turn Off the Water Supply: Locate the nearest cold water supply line and turn it off before beginning any installation work.
  • Connect the Water Line: Attach one end of the water line to the refrigerator’s water inlet valve. Secure the other end to your home’s water supply valve, ensuring all connections are tight to prevent leaks. Turn the water supply back on and check for any leaks at the connection points.

Positioning and Leveling the Refrigerator

Proper positioning and leveling are key to ensuring your refrigerator operates efficiently:

  • Move the Refrigerator into Place: With the help of another person, gently slide the refrigerator into its designated spot. Use a dolly if necessary to prevent damage to your flooring.
  • Level the Refrigerator: Adjust the front leveling legs to ensure the refrigerator is perfectly level. A level fridge prevents the doors from hanging open and ensures the cooling system operates correctly. Use a carpenter’s level to check both the side-to-side and front-to-back balance.

Connecting the Power

With the refrigerator in place and leveled, it’s time to power it up:

  • Plug In the Refrigerator: Plug the refrigerator into the power outlet. Ensure the cord is not pinched or trapped under the appliance. It’s advisable to use a surge protector to safeguard your refrigerator against power surges.
  • Set the Temperature: Once plugged in, set the refrigerator and freezer compartments to the recommended temperatures. Typically, the fridge should be set to 37°F (3°C) and the freezer to 0°F (-18°C). Allow the refrigerator to cool for at least 24 hours before stocking it with food to ensure it reaches the desired temperature.

Final Adjustments and Inspection

Before you start using your new refrigerator, a few final checks are necessary:

  • Check Door Seals: Ensure the doors close tightly and the seals are in good condition. Proper sealing is crucial for energy efficiency and keeping your food fresh.
  • Inspect the Water Dispenser and Ice Maker: If your model includes these features, test the water dispenser and ice maker to confirm they’re working correctly. It may take a few hours for the ice maker to start producing ice.
  • Review the User Manual: Finally, review the user manual for any specific instructions or tips provided by the manufacturer. This is particularly important for advanced models with digital controls or smart features.

Maintenance Tips for Long-Term Performance

To ensure your refrigerator remains in top condition for years to come, regular maintenance is essential:

  • Clean the Coils: Every six months, clean the condenser coils located at the back or bottom of the refrigerator. Dusty coils reduce efficiency and can cause the refrigerator to overheat.
  • Change the Water Filter: Replace the water filter every 6 months or as recommended by the manufacturer to ensure clean water and ice.
  • Check the Door Seals: Inspect the door seals regularly to ensure they’re not cracked or damaged. Replace them if necessary to maintain energy efficiency.
  • Monitor Temperature Settings: Periodically check the internal temperature of your refrigerator and freezer to ensure they’re at optimal levels.

Troubleshooting Common Issues

Even with proper installation, you may encounter some common issues. Here are quick fixes for some of them:

  • Refrigerator Not Cooling: Check the temperature settings and ensure the vents inside the fridge aren’t blocked by food items.
  • Water Leaks: Verify that the water line connections are tight and inspect the drain pan for cracks.
  • Strange Noises: Ensure the refrigerator is level and that it’s not in contact with any walls or cabinets.

Conclusion

Installing a refrigerator doesn’t have to be a daunting task. By following these steps, you can ensure that your new appliance is set up correctly for optimal performance.

However, if you’re unsure about any part of the installation or run into issues, don’t hesitate to contact King Appliance Repair Company.

Our team of professionals is ready to assist you with expert advice and repair services to keep your kitchen running smoothly.

Remember, proper installation is the first step toward a long-lasting, efficient refrigerator.

Taking the time to do it right will pay off in the form of energy savings, better food preservation, and fewer maintenance issues down the road.

If you need assistance, reach out to us today!

For more tips on appliance care and maintenance, be sure to explore our blog or contact King Appliance Repair Company for all your repair needs.